Tuesday, September 9, 2014
Custom Camouflage Letter A
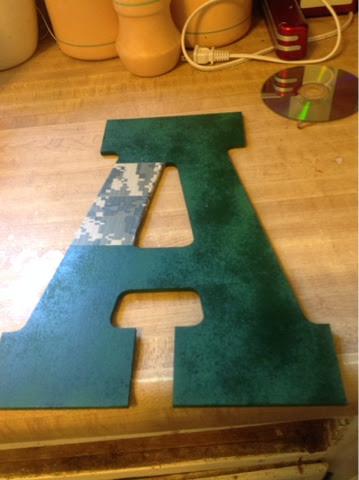
For Alex we decided initially to go with a camouflage background and see where that would lead us. So, I got the chipboard letter A from Hobby Lobby, then painted it green just in case any of the wood glared through the tape. Since the duct tape would leave a raw edge on the back, I've decided to forego backing it with felt until after it is finished. Here is where we stand at the moment.
Monday, September 8, 2014
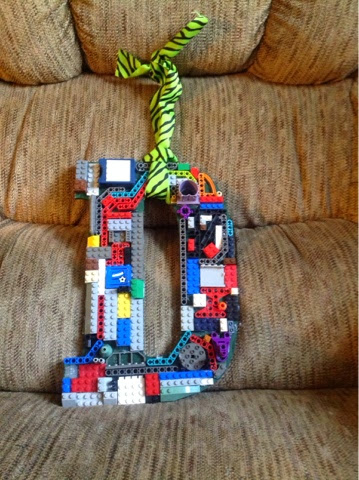
Custom Hanging Lego Initial
So, I finished gluing the Legos on the letter. The hardest part I feel was finding and fitting the Legos into the small places. I decided not to spray a varnish on it so it can still be played with. Then I tied a ribbon around the top so that it can be hung on the door by one of those Command Adhesive hooks. Here's the final letter.
Next, my son Alex has asked for a custom letter "A" to accompany the "D". Alex picked out camouflage duct tape as a back ground and will decide on the decorations letter.
Friday, September 5, 2014
Here we go.
I got a chipboard letter "D" at Hobby Lobby for all of four dollars. I spray painted it green as that's Daniel's favorite color, then backed it with green felt so it won't scratch the door
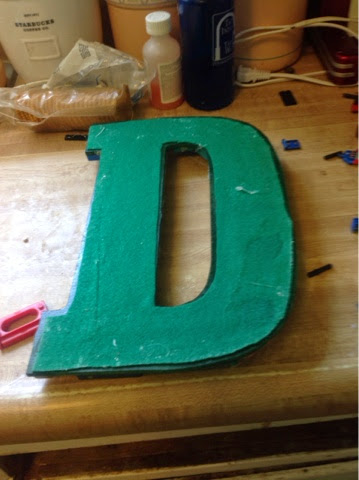
Then off I went to the massive bin of Legos. I just grabbed handfuls then fired up the old hot glue gun and started putting them on in random order. I started in a corner but I knew the general place where some of the pieces would go. That's where I am now, about 75% finished.

I plan of finishing off the letter then spraying some kind of non-yellowing varnish on it.
Subscribe to:
Posts (Atom)